Introduction
GitHub Actions is probably my favourite DevOps tool out there due to its extensibility and tight integration with platform itself. In this article we will take a look at how deploy a simple .NET 5 web application to an App Service in Azure. This article assume that you have both dotnet and Azure CLI installed on your system. If thats not the case, stop here and install it.
The .NET 5 application
Our application is probably the simplest .NET web application you have ever created. Lets open our terminal and create the following folder structure for our project.
project-name
└───src
└───.github
│   └───workflows
│       │   deployment.yml
Create a new .NET 5 project inside the src folder by running the following command. dotnet new web -n 'my-project-name' -f net5.0
Open the project in your favorite code editor tool, find Startup.cs and change the content to:
public class Startup
{
    public void Configure(IApplicationBuilder app, IWebHostEnvironment env)
    {
        app.Use(async (ctx, next) =>
        {
            if(ctx.Request.Method.ToLower() == "get")
            {
                await ctx.Response.WriteAsync("Hello, world!");
            }
        });
    }
}
Like I said; the simplest app you've ever created. It's time to push everything to your GitHub repository. The next step is to create our App Service in Azure.
Create the Azure App Service
-
Log into your Azure Account by typing
az loginto bring up the sign-in window to the Azure Portal. Select your account and login. -
Create a new Resource Group
az group create -n 'your-name-rg' -l 'westeurope' -
Create an App Service Plan for your web app
az appservice plan create --name 'my-appservice-plan-name' --resource-group 'your-name-rg' --sku FREE -
Create an Web App
az webapp create --name 'web-app-name' --resource-group 'your-name-rg' --plan 'my-appservice-plan-name' -
We need to get the publish profile for our web app. Open your browser, navigate to the Azure Portal and find your WebApp. Press the 'Get Publish Profile' button to download it.

Create secrets for GitHub Actions
Before we start editing our .github/deployment.yml file, lets upload the Publish profile file to GitHub secrets so that we can access it from our workflow.
- Find your GitHub Repository Settings tab
- Select 'Secrets' from the menu.
- Press 'New Repository Secret'
- Under 'Name' enter
PUBLISH_PROFILEand paste the content of the downloaded publish profile file into 'Value' section.
Create the workflow file
Open the file we created under .github/workflows in your prefered code editor or from GitHub and past in the following.
name: "Build app and deploy to Azure"
on: [push]

jobs:
  build:
    name: 'Build and Deploy a ASP.NET 5 App to Azure App Service'
    runs-on: 'ubuntu-latest'
    steps:
      - name: 'Checkout Code from Repository'
        uses: actions/checkout@v2
      - name: 'Set up .NET 5.0.x'
        uses: actions/setup-dotnet@v1
        with:
          dotnet-version: '5.0.x'
      - name: 'Publish a Release of the App'
        run: |
          cd src/
          dotnet publish -c Release --output '../published-app'
      - name: 'Deploy to Azure App Service'
        uses: azure/webapps-deploy@v2
        with:
          app-name: 'web-app-name'
          publish-profile: ${{ secrets.PUBLISH_PROFILE }}
          package: ./published-app
Lets go through the file step by step.
- First we define a name for this workflow. Secondly we define when the workflow should run. In this particular case, everytime a push is done against any branches within the repository. You can read more about the
on:-keyword from the GitHub docs - The next step is to define jobs. A GitHub Actions Workflow can consist of many jobs, whereas one job can have multiple steps and each step can run either a shell command or an action. You can either create your own actions or use action created by others. All of the actions can be found on GitHub Marketplace. In this particular example we will use a combination of shell commands and actions to deploy our app to Azure App Service.
- A job has a name, a machine to run on, either self-hosted or GitHub-hosted, and steps. We choose to run this workflow on a GitHub hosted machine running the latest supported version of
ubuntu. - Our first step is to checkout code from the repository
- Next we install
dotnet 5.0.xonto the machine running our build by utilizing actions from GitHub Marketplace. - Then we run a shell command to navigate to the
src-folder and then runningdotnet publishwhich will restore NuGet-packages and create a deployable artifact to the specified directory. - Its now time to publish our app to Azure. Again, we're using an action from the GitHub Marketplace called Azure WebApp. This action has three parameters specificed by the
'with:'-keyword. The name of our App Service in Azure, the publish profile we added to GitHub Secrets and a package artifact which was the result from the `dotnet publish´.
Thats it. Remember that each time you do a push to any branch in the repository, this worflow will run. You probably want to change this at a later stage to specify a particular branch. Another element to consider is to run your tests as a step before deploying the app to Azure. This can be achieved by running dotnet test as a shell command.
The result
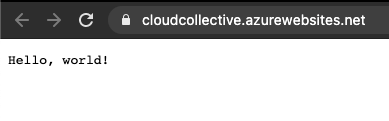
Go back to your App Service in Azure, Select the 'Overview' tab and find the url for your app. Browse this url and you will see the text 'Hello, world' outputted in your browser.
The source code can be found here
Thanks for reading!