Microsoft recently announced that a new service for publish and subscribe scenarios has been made available in Azure. The new service has been branded Azure Web Pub Sub. The service is a managed, distributed version of SignalR that uses WebSockets to perform full duplex communication over a single TCP connection.
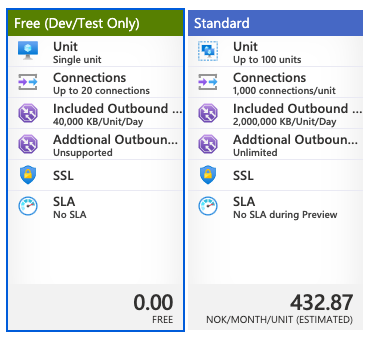
In terms of pricing the service comes with two different options. A Free tier which, according to Microsoft, should be used for Dev/testing purposes and a Standard Tier. The illustration below shows the difference between these two tiers as of 30/4-2021.
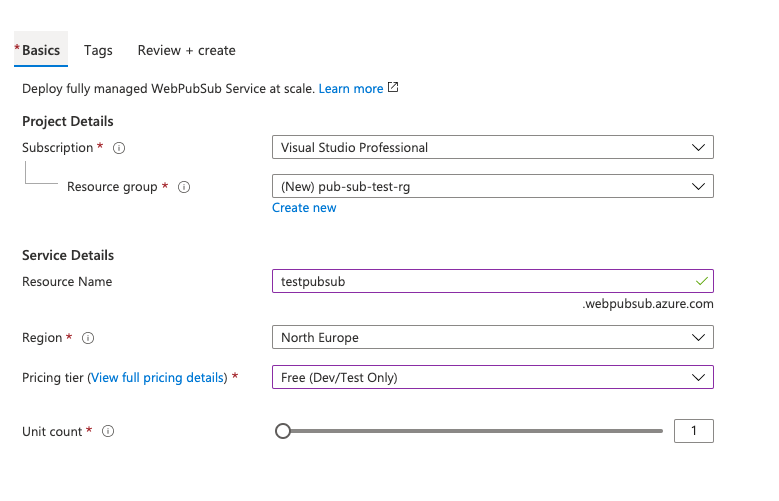
To create the service head over to the portal and search for Web PubSub Service. As always you need to select a resource group for the service, a name, a region and pricing tier. As of now the service is only available for deployment to East US, North Europe, Southeast Asia, West Europe and West US 2.
Show me the code!
Let's create two simple .NET 6 console applications, one server and one client. We will also use two NuGet packages, Azure.Messaging.WebPubSub and WebSockets.Client.
Both applications will connect to a specific Hub, a concept of separating messages, in the Azure Web Pub Sub service. The server will publish messages and the client will listen for messages in this Hub.
namespace Server
{
    public class Program
    {
        public static async Task Main(string[] args)
        {
            var connectionString = "<connection-string>";
            var hub = "test_hub";

            var client = new WebPubSubServiceClient(<connectionString, hub);
            await client.SendToAllAsync("Welcome to Azure Web PubSub!");
        }
    }
}
namespace Client
{
    public class Program
    {
        public static async Task Main(string[] args)
        {
            var connectionString = "";
            var hub = "test_hub";

            var client = new WebPubSubServiceClient(connectionString, hub);
            var url = client.GetClientAccessUri();

            using var websocketClient = new WebsocketClient(url);
            websocketClient.MessageReceived.Subscribe(message =>
            {
                Console.WriteLine($"Received message: {message.Text}");
            });

            await websocketClient.Start();
        }
    }
}
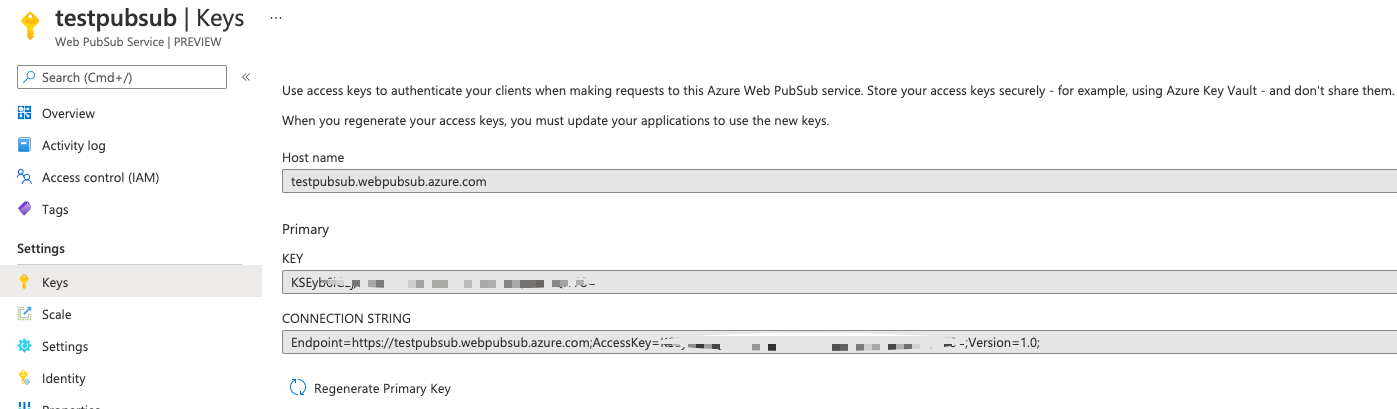
The connection string can be found under Keys in the service.
Start by running the client application: dotnet run Client.csproj and then the Server to publish a single message. dotnet run Server.csproj.
If everything is setup correct, the Client application will now print out Received message: Welcome to Azure Web PubSub!. We can also take a look in the portal to view traffic passing through the service

Wrapping up
This was a very brief introduction to Azure Web Pub Sub Service which Microsoft released yesterday, 29/4-2021. The service is a great for implement chat functionality, notifications, live dashboard and so on in your application.
Thanks for reading!